Creating a “Lights Off” Game in GameMaker
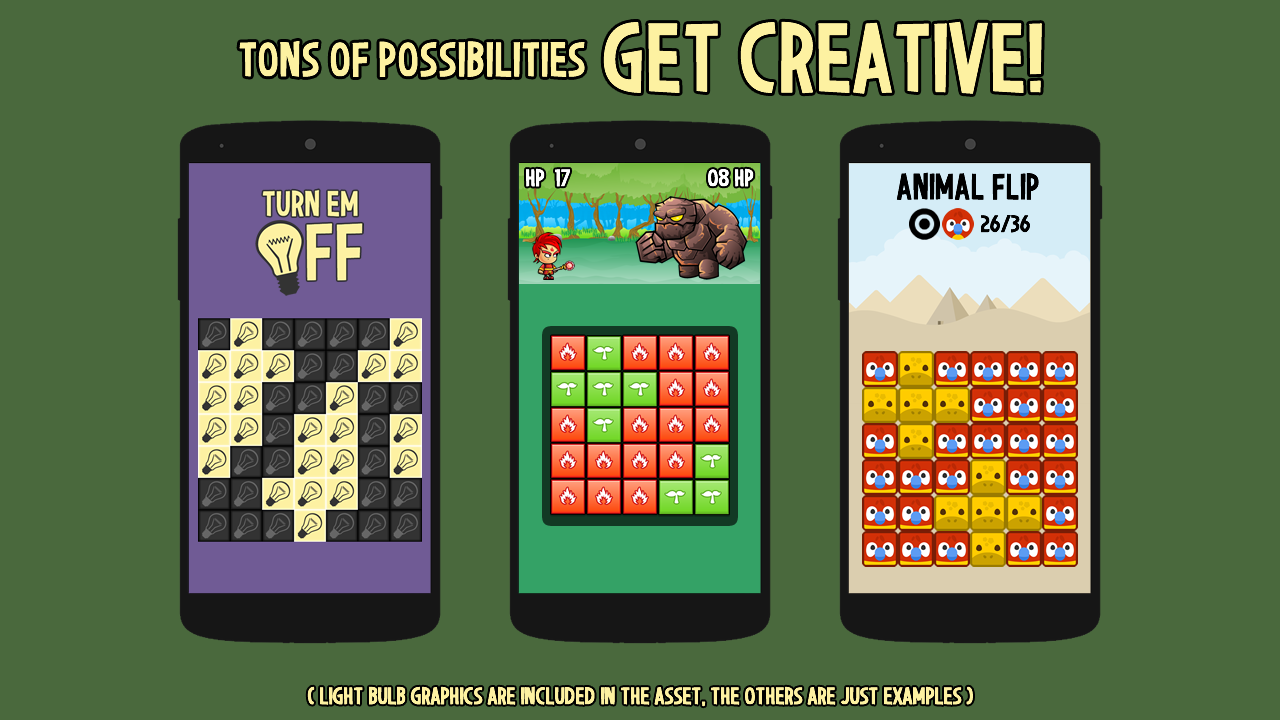
Recently at Chequered Ink we released a game called Chippity Flip, our own take on “lights off” puzzle games, where the player toggles multiple squares at once to make the whole board the same colour. The process behind the game’s creation is pretty simple when you understand it and the solutions used could come in handy for making other puzzle and board games – especially if you’re new to game development – so here I am going to lay out how the project works for everyone to learn from.
Overview
To create this game, we need to understand how to create the grid, populate it with a random puzzle, and have it respond to user interactions. From there you can add extra features like RPG battles, or a timer, or moves counters, but for now I’ll just cover the basics of creating the game as well as some of the reasons behind the method I have used.
Creating & populating the game board
To begin with we will set up some helpful variables to use later on. The reason we are setting these as variables at the beginning of our script, instead of just placing their values throughout the script, is so that we can easily change the game later without having to revise the same numbers in a whole bunch of places.
// SET UP SOME VARIABLES
var gridX = 0;
var gridY = 0;
var gridCols = 7;
var gridSquares = 49;
var gridRows = ceil(gridSquares/gridCols);
var cellWidth = 48;
var cellHeight = 48;
var goodObject = obj_good_tile;
var badObject = obj_bad_tile;
var badClicks = 6;
The variables gridX and gridY indicate where the top-left of your grid will appear on the game screen, gridCols is the number of vertical columns in your grid and gridSquares is the total number of squares (and therefore gridRows can be calculated automatically). cellWidth and cellHeight should be the width and height of the actual objects you intend to use as the “tiles” on your game board, and goodObject and badObject should be the names of those objects. Finally, badClicks is the number of times the game should create new “bad” tiles on the board. More about this in the “Inserting bad tiles” section below.
Then we add the following code to create a ds_grid which will store information about our game board before we construct it using objects:
// START GRID CREATION
var myGrid = ds_grid_create(gridCols,gridRows);
for (i=0;i<gridSquares;i++) {
    ds_grid_add(myGrid,i mod gridCols,i div gridCols,0);
}
ds_grid_clear(myGrid,0);
Using a for loop, we can easily populate the entire grid with “0”, or “good tiles”. Note the use of mod and div to automatically populate the correct “row” and “column” of the grid. This kind of thing scared me when I first started out in game development, but this simple maths is extremely valuable for many different types of project, so it helps to get into the habit of using it. It is possible just to use ds_grid_clear, as shown in the example, to populate the whole grid at the same time. However, learning how to directly populate a grid is useful for all kinds of future applications.
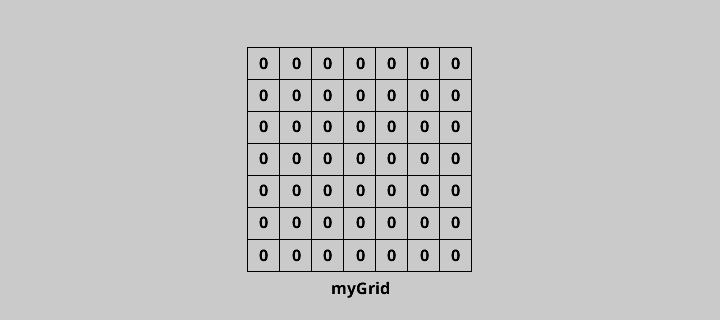
A visual representation of what we have just created is as follows:
Next we need to populate the grid with “bad” tiles to turn this game into a real puzzle.
Inserting “Bad” Tiles
In a “lights off” style game, some grid patterns are always possible to solve. For example, any puzzle on a 7×7 grid will be possible to complete no matter how hard it looks. However some grids, like a 5×5 grid, are not always possible to solve. If you want your game to be fair, you can’t just randomise the tiles on the board since you might create an impossible puzzle.
The perfect way to ensure that your puzzles are always possible to solve is to insert “bad” tiles as if the game were being played in reverse. Start with a clean grid of “good” tiles, then have your code simulate finger presses to create “bad” tiles. If this is done correctly the puzzle will always be solvable because the player can simply touch the tiles in reverse order, although they will obviously be unaware of the order in which the game set up the tiles.
// INSERT "BAD-CLICKS"
for (i=0;i<badClicks;i++) {
    // PICK A RANDOM TILE TO CLICK
    var mySquare = round(random(gridSquares));
    var myCol = mySquare mod gridCols;
    var myRow = mySquare div gridCols;
    // CHECK THE CURRENT VALUE OF THE TILE AND TOGGLE IT
    var disValue = ds_grid_get(myGrid,myCol,myRow);
    ds_grid_set(myGrid,myCol,myRow,!disValue);
    // NOW CHECK AND TOGGLE THE TILES ADJACENT TO THE CLICKED TILE
    // SEE THE IMAGE BELOW FOR MORE DETAIL
    myCol -= 1;
    if (myCol > -1 && myCol < gridCols && myRow < gridRows && myRow > -1) {
        disValue = ds_grid_get(myGrid,myCol,myRow);
        ds_grid_set(myGrid,myCol,myRow,!disValue);
    }
    myCol += 1;
    myRow -= 1;
    if (myCol > -1 && myCol < gridCols && myRow < gridRows && myRow > -1) {
        disValue = ds_grid_get(myGrid,myCol,myRow);
        ds_grid_set(myGrid,myCol,myRow,!disValue);
    }
    myCol += 1;
    myRow += 1;
    if (myCol > -1 && myCol < gridCols && myRow < gridRows && myRow > -1) {
        disValue = ds_grid_get(myGrid,myCol,myRow);
        ds_grid_set(myGrid,myCol,myRow,!disValue);
    }
    myCol -= 1;
    myRow += 1;
    if (myCol > -1 && myCol < gridCols && myRow < gridRows && myRow > -1) {
        disValue = ds_grid_get(myGrid,myCol,myRow);
        ds_grid_set(myGrid,myCol,myRow,!disValue);
    }
}
The above code simulates clicks on the grid to set the “bad” squares as if there were an imaginary “player” playing the game in reverse, messing up the board rather than solving the puzzle. All we have to do now is convert our ds_grid into real, clickable objects. In theory you could just use the ds_grid_* functions to code the entire game, but since the purpose of GameMaker: Studio is to make game development easy and visually appealing, I think it’s best to use real objects at this point.
Creating the clickable grid
Creating the playable grid itself is pretty easy, we just need to cycle through the ds_grid we created, check the value of each cell, and place either a “good” or “bad” tile in the room according to that value.
Our good old friend the for loop makes this possible in just a few lines of code as follows:
// CREATE & POPULATE PHYSICAL GRID
for (i=0;i<gridSquares;i++) {
    var disValue = ds_grid_get(myGrid, i mod gridCols, i div gridCols);
    if (disValue == 0) {
        instance_create( gridX+((i mod gridCols)*cellWidth), gridY+((i div gridCols)*cellHeight), goodObject);
    } else {
        instance_create( gridX+((i mod gridCols)*cellWidth), gridY+((i div gridCols)*cellHeight), badObject);
    }
}
// CLEAN UP DS GRID, WHICH IS NO LONGER NEEDED
ds_grid_destroy(myGrid);
Notice how we use gridX, gridY, cellWidth etc. instead of hard-coding values into the script. This means that you can change the way the game board looks and behaves at any time simply by changing the variables at the start of the script. In our example, you should end up with something like this:
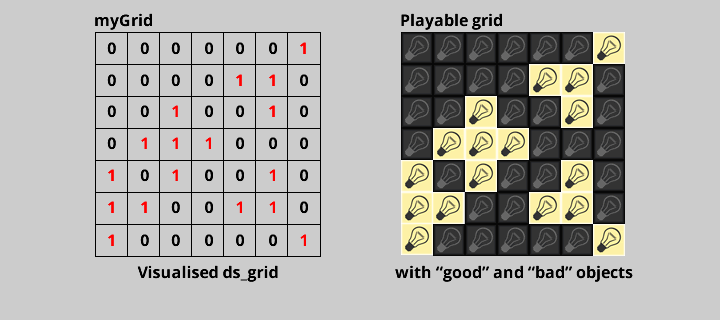
And that’s it, the hard part is over! Your game board has been created. All you need to do now is tell your “good” and “bad” objects how to respond to mouse clicks.
Flipping Tiles
Flipping tiles in your “lights off” game is a simple case of toggling the object has been clicked and doing the same to four adjacent tiles that surround it. For example, below is a chunk of code that checks and toggles the tile to the left of a clicked tile:
// CHECK THE TILE TO THE LEFT AND TOGGLE IT
var tileID = instance_place(x-1, y, [parent object]);
if !(tileID == noone) {
    with (tileID) {
        if (object_index == [good tile]) {
            instance_create(x,y,[bad tile]);
        } else {
            instance_create(x,y,[good tile]);
        }
        instance_destroy();
    }
}
If a tile exists next to the one that was clicked, its state is checked and it is replaced by the opposite “good” or “bad” tile. This code should be repeated for objects above, below and to the right of the object that was clicked, as well as that object itself. A visual representation of this code is as follows:
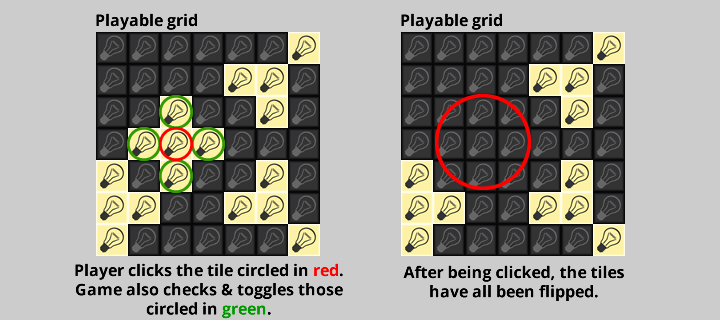
Of course, as I said earlier, you could continue to use the ds_grid functions instead and simply draw a visual representation of your grid to the screen. However, if you want to add some polish like fancy tile-flipping animations or RPG battles or some other crazy feature to your game, then it’s a lot easier to detach the puzzle from the ds_grid system and use clickable objects. It’s also easy to check whether the player has completed the puzzle, using the following simple code:
if !(instance_exists([bad tile])) {
    // WINNING CODE GOES HERE
}
and that’s how you create your own fully-fledged “lights off” game!
Summary
Learning how ds_grids work, and how they can be populated and read using simple for loops, will come in extremely handy for future projects. The principles set out in this tutorial could be used to create a minesweeper game, a battleship game or any other grid-based board game you can think of. As more of a visual learner it has often been hard for me to make this kind of project a reality, but now I am familiar with the concepts involved I know I can take these ideas into future projects to make them even better. I only hope this tutorial can be helpful in the same way for any beginners out there who find data structures a bit scary!
Get the demo project
If you want to see the code in action, the demo project made in this tutorial is available on itch:
This demo was made for GameMaker: Studio 1.4 and may need revising for the current version of GameMaker.
